Thursday, May 9, 2013

Birthday card for my mom!

Front of birthday card

Inside of birthday card

My mother turned 89 years old in March.  Everyone who knows my mother knows she loves anything with an Oriental flair!  I found some gorgeous oriental designer card stock at a local scrapbook store.  I couldn't resist buying the papers, knowing they would make a gorgeous card for my mom's birthday.  I also bought an oriental stamp to coordinate with the papers.  

I used versa mark ink when stamping the oriental image on black card stock.  I then sprinkled gold embossing powder over the ink and used my heat gun to emboss the image -- it really turned out beautifully!  I trimmed the paper down so only the design was left on the black card stock.  I used turquoise card stock as a mat underneath the black card stock to make more of a statement, highlighting the embossed image as well as picking up some of the turquoise color from the printed card stock.  Then the fun began, cutting up the oriental card stock, piecing it on the front of the card.  I scored a small square of black-gold oriental card stock and folded it into a fan.  I then attached a gold thread around the base of the fan and used heavy-duty glue dots to keep it attached to the card front.  I found a "Mother" embossed sticker from KCompany, which complimented the rest of the card front.

I wanted the inside of the card to be a special as the front, so I found a border punch with an oriental-type look and punched two borders out of black card stock to frame the inside verse that I printed on gold card stock.

I was really happy with the final product -- so was my mom!  Let me know your thoughts!

Tuesday, January 15, 2013

Valentine's Day Cards 2013

Valentine Bird

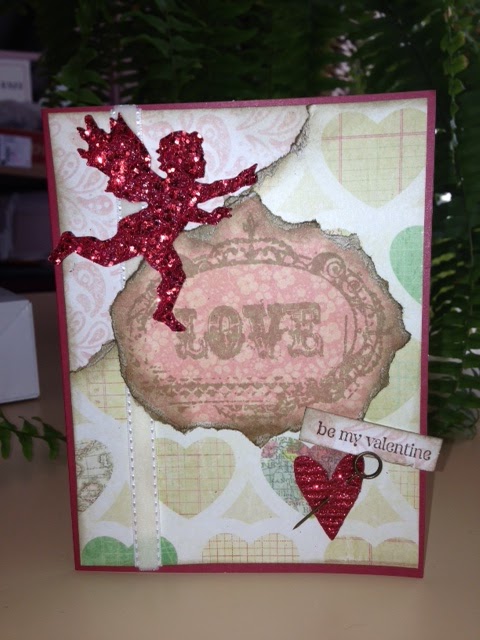
Vintage Cupid / Heart

Vintage Valentine Girl

Love Birds

Vintage Valentine


Here are the first five cards I have designed for my Valentine's Day workshops this year.  Each one is unique, with different techniques.  Besides Valentine's Day, these could also be appropriate for weddings, bridal showers, birthdays, etc.

My classes will be on Wednesdays during our lunch hour here where I work.  I use a conference room down the hallway from my office.  Lots of fun and a great way to release some tension at the workplace, playing with paper, scissors and glue for an hour during the work day!

I'll be uploading a few more cards later this week, once my new Stampin' Up! order arrives with lots of new goodies to play with!  

Let me know what you think of these cards!!!

Interested in buying any of my card creations?  Go to the Uniquely Noreen link in the right hand column to see prices and ordering information!  Looking forward to hearing from you!!!

Tuesday, June 19, 2012

Creating Embellishments!

Plain chipboard die cuts

Decorated brads, borders, etc.

Chipboard die cuts stained and distressed with metallic paints

Thought I would give you a view of my workspace where I do a lot of my card design work.  Here are some chipboard cutouts that I distress with stains and then highlight with metallic dauber paints.  The fun part is trying to get the stains and paints off my fingers when I'm done for the day!

Nature-Inspired Cards

Flower/Bird Vine

Acetate Butterfly 

Bird Egg printed cardstock/embellishment
                                               
I've been playing with some embellishments, border punches, and papers and designed a few new cards using a nature theme for the Little Red School House craft show that will be held the first Sunday in October.  Everything has to have something related to a nature theme for that particular show.  Some of the embellishments are acetate designs (butterfly and bird), chipboard (vines), and 3-dimensionals (words).  

50th Wedding Invitation


A lady who purchased a few of my greeting cards at a craft show last fall called me to see if I might be interested in designing invitations for her and her husband's 50th wedding celebration.  I scanned a copy of their wedding photo and cropped it down to the size I would need to balance the front of the invitation.  I chose four different printed cardstock designs and started tearing and distressing the paper until I came up with this design.  I stamped the word "Memories" on one of the printed papers and attached two antique brads to the sides.  I distressed all edges of the papers and photo to give it a vintage look.  A small silk flower with a pearl center is attached with a tiny glue dot after the edges were distressed.  I found a golden-colored organza ribbon that gives the card a little more elegance and wrapped it around the entire front of the card.  The inside of the card was printed directly from my computer.  The couple was thrilled with the results and originally ordered thirty invitations. A week later, they order an additional ten invitations!  I am really proud of the result!!!

Thursday, May 10, 2012

More Mother's Day Cards!


Here are three more cards I designed for Mother's Day, each one is unique!  The first one uses a die cut that is in the shape of an apron.  I embossed the entire shape after it was stamped.  I then added stamped flowers that I cut out individually and attached using small glue dots for a little dimension.


The second card was distressed on the edges of the mat, the border strip that I cut from a new Martha Stewart punch, and the flowers made from a Tim Holtz die cut -- lots of fun!  


The third card used three embossing folders:  one for the top section of the card, one for the bottom section, and the third for the hat.  I used a circle punch, a scalloped oval punch and a smaller oval punch to make the hat.  Added a small width ribbon to the hat brim, punched a small flower, added a tiny yellow pearl in the center of the flower...and added the vintage lace around the center for texture.  


Let me know what you think!

Mother's Day Card from Kids

Card front

Inside of card


Here is the Mother's Day card I made for my co-worker 's kids 
to give to their mom.  

I used a printed cardstock for the front, printed the words on my computer, cut out the tags and attached them to the flower stems using bright yellow-orange twine.  

The inside verse was placed over a pink cardstock mat that coordinates with the front of the card.

Let me know what you think!

Mother's Day Card


I made this card for one of my co-workers needing a Mother's Day card for his wife.  I like the coordination of the ribbon that has the brown border and the printed cardstocks.  I also was happy with the flowers and how well they balanced the card front.


Let me know your thoughts!

Baby Shower Invitation


Front of Baby Shower Invitation

Inside of Baby Shower Invitation


Wednesday, April 18, 2012

Music Student Teacher Thank You Card

Add caption

Here is a thank you card I made for Steve's music student teacher who will be leaving the school district the end of this week.  I found the cover vellum paper in the "Performance" card stack.  I embellished the card front with a tulle flower and added some gold rhinestones to the music staff, etc.  I also found some burgandy/gold foil paper and used a border punch along one strip for the top of the card and then ran a piece of off-white satin ribbon with gold stitching along the border strip.  The inside verse is perfect for a future teacher!  I also used a strip of the burgandy/gold foil paper as a bottom border for the inside of the card.  I am really happy with the way this turned out!

Let me know your thoughts!!!!!


Wednesday, December 14, 2011

Whimsical Christmas Tree

Glitter and more glitter!!!  I fell in love with the Tim Holtz heart/wing sizzix die about a year ago and have used it for quite a few different holiday cards.  I wanted to do a whimsical card and decided to include the wings with the Christmas tree -- something fun as well as different!  The background paper is a copper glitter design, the tree is a rectangle I cut by hand from another glitter paper, and the wings were die cut from champagne-color glitter paper.  I used a SU border punch for the scallops around the tree edges.  I used a  Fiskar star punch on copper glitter paper for the top of the tree and embellished it with a SU tiny jingle bell for some added whimsy.  The soft suede taffeta ribbon was attached using a tape runner prior to pleating the ribbon.  The SU white velvet ribbon give the card a little bit of texture and old-fashioned feeling.  I used dimension dots to lift the tree off the top of the card to give it some height.  The verse was stamped using soft suede ink and cut by hand.  I added two tiny gold-color pearls along each side of the verse for a little more elegance.
The teddy bear in the background is one I designed for my fall craft shows this year -- he is just so darn adorable!

Stocking card

Once again, my teddy bear is holding up my Christmas card -- isn't he just adorable???
This is a card I made at a Stampin'Up! stamp camp the end of September.  The new SU snowflake embossing folder was used on the green mat -- beautiful effect!  The stocking was stamped and then punched out using the new SU stocking punch as were all the silver glitter pieces.  This is the brand new silver glitter paper from SU -- absolutely breathtaking!  Such high quality, almost looks like little diamonds floating on the paper.  Well worth the little bit extra cost of this paper!  A tiny jingle bell and bakers twine finish off the embellishments of this card.  Cute and simple yet elegant!

Snowman pop-up card


I used the new Inky Antics Penguin stamp set for this Christmas card -- I think the grandkids will love it!  The printed cardstock was used for the inside of the card (looks like little snowflakes falling from the blue sky) -- like the effect this has on the snowman!  The card front mats were made from two coordinating glittered cardstocks and a red ribbon with silver glitter circles for that little bit of bling.  Watercolor pencils were used for the penguins, snowman hat, and branch along with a blender pen to soften the colors.  The penguin on the front was attached using dimensional dots to give it a little lift off the paper.  This one was time consuming -- but definitely worth it!!
The teddy bear in the background is one of my creations from this past fall craft season -- love him!

Baby It's Cold Outside!


What a fun card to make!  I used glitter background papers and added a champagne-color glitter ribbon where the papers met to give it some "bling"!  Soft suede ink was used for both the front and inside of the card, including the distressing along the torn edges of the stamped girls image.  I highlighted areas of the girls using chalk to give it a muted color -- like the way it looks!  Dimensional dots were used to lift the stamped image off the front of the card.  I then used a new Tim Holtz die cut for the evergreen boughs and holly leaf; a circle punch was used for the holly berries.  When it was assembled, I used glitter glue and sprinkled mica flakes to give the card an old-fashioned look.  Really like this one!

Old Lamp Post Christmas Card

Here is the favorite card I designed (so far!) for this Christmas season.  I used the new Tim Holtz old-fashioned lamp sizzix die, a retired Christmas Verse from Stampin'Up!, a few different glittered papers for the background, and then highlighted the entire lamp post with mica flakes to give it an old-fashioned look.
I ripped the right top corner of the background paper and distressed the edges using soft suede ink.  I then added a complimentary piece of cardstock in the area that was exposed...  The light from the lamp was cut from gold vellum, so it gives a soft glow to the look of the card.  The holly leaves were die cut from a printed green paper and then distressed.  The holly berries were die cut using red velvet paper -- really looks nice and elegant!
I hope you enjoy this card as much as I do!  Oh -- the teddy bear holding up the card is one of my own creations that I sold at local craft shows this fall -- isn't he just adorable???!!!

Wednesday, November 2, 2011

Creep On Over Halloween Card


Here is the last Halloween card I designed this year.  I used a Martha Stewart Halloween border fence for the front of the card along with a Sizzix bat die.  The polka-dot paper was already distressed.

Check out the inside of the card -- the spider web with attached spiders spreads out when the card is open!  I used a new Sizzix spider web die that uses two brads to attach the web to each side of the inside of the card.  Black glitter cardstock was used for the spiders to give them a little bling  Verses are from a Stampin'Up! stamp set.  Looks much more difficult than it actually was!  Fun for the kids (and adults, too!)

Halloween Witches Legs

What a fun and rather easy card this was to make!  I used three different border punches for the bottoms of the skirts.  A Stamp-a-ma-jig helped me with the placement of the witches legs, starting with the middle set of legs to make sure they would all fit on the front of the card.  Stampin'Up! inks and blender pen were used to color the legs; the new Stampin'Up! verse was used on the top of the card -- love this calligraphy of this stamp!  I found the purple with tiny lime green star ribbon at the local Michaels -- I think this really makes the card "pop"!  A few rhinestones were then added to the buckles of the shoes.  This card was quick and easy (with the help of the stamp-a-ma-jig, that is!)

Halloween Candles Card

I used lots of Tim Holtz products for this card, including his candle die cut, white crackle paint, and Halloween tissue tape.  A sanding sponge was used to distress the candle base that was cut from black/gray core-dination paper.  Gold smooch paint used for the flames with a line of orange marking pen for the flame.  A piece of black cotton web material purchased from Joann's was attached to the green/black bat background paper using a tape runner in a few areas and tapped down lightly.  The orange/black diamond glitter tape was purchased at Michaels and adds a bit of bright color to the card.  Another fun card to make!

Halloween Skull Card

This is my favorite Halloween card I designed this year!  Four different Sizzix dies were used for the following pieces:  skull, wings and crown, fence, scalloped oval and center.  All die cuts were also distressed using ranger inks to tone down the mood of the card.  The fence was die cut using core-dination paper and then distressed using a sanding sponge.  An old paperback book page was wadded up into a ball and then torn to fit the card base, leaving some of the green printed background show around the edges.  Rhinestones were added to the skull eyes and along the crown tips.  This one was so much fun to make!  Lots of cutting with the die cut machine, but I love the way this turned out!!!

Halloween Word Card

Stampin'Up! stamp set, inks, blender pen, and embossing folders are the basis for this card I designed.  I love using the blender pens with the inks -- gives a nice, muted look to the colored areas.  The embossed background papers give a little texture to the card.  I also used two different Martha Stewart Halloween border punches:  spider web (top black border) and the spiders (bottom black border).  Like the way this turned out -- lots of fun and easy!